Friday, September 28, 2018

Thank A Friend

This week, the theme is one I chose.  I've been wanting to do this for a long time - thank my friends.  I think about them often, but am always doing something, so don't take the time to email, call, or text that I'm thinking of them and appreciate them.  So, this was a good way for me to really think about my friends and send them cards to say, "Thank you for being an awesome you!"

This is the card I made.  I made 12 of them and sent them out. 


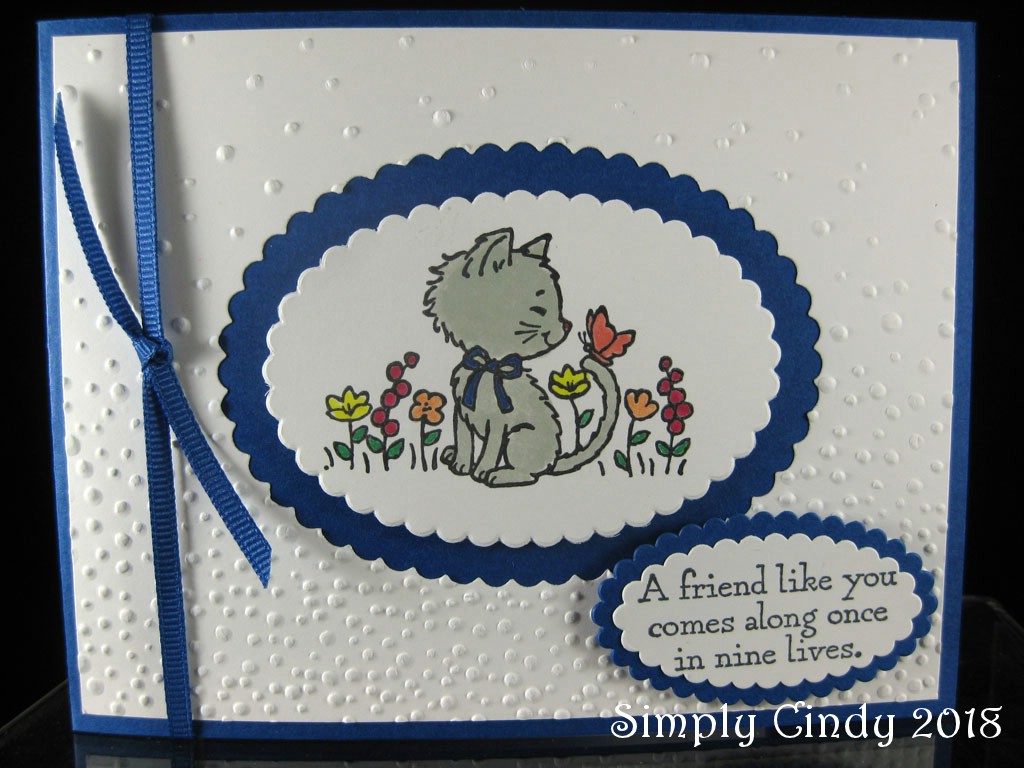
I love this adorable Pretty Kitty and the saying was purrfect ;)

I first decided on this image and the sentiment, stamped using Memento Black, then die cut them using the ovals thinlets.  I took a piece of white cardstock and ran it through the Softly Falling embossing folder and then used a bigger oval thinlet to diet cut our the middle.  I colored in the image using the SU! markers.  I used this year's In Colors along with Calypso Coral for the butterfly and Basic Gray for Pretty Kitty.  I decided to use Blueberry Bushell as the base color and added the matching ribbon at the end. 

To all of you who are great friends, either to me or someone else, thank you!

Check out the cards the other Sisters In Stamping created here.

Thank you for looking and have a wonderful weekend!

Friday, September 21, 2018

A little punch art

This week, Rachel challenged us to create a project using punches.  This is always a tough one for me.  I can't see past the actual shapes of the punches to create something new!  But, I was able to come up with this card:

I created this little Kokeshi doll using the Vases Builder Punch.  I created the background using the Artfully Folded stamp set.  I placed several of the images on a large block and then inked and stamped randomly.  I used a piece of DSP from the Tropical Escape pack and that's where I drew the color from - Blushing Bride. 

I love punches, but clearly I'm not a punch artist!  LOL :)

Please check out the other punch creations at the SIS blog here.

Thanks for looking and have a great day/weekend!

Friday, September 14, 2018

Layout Challenge Accepted!

This week, Jennifer challenged us to create a card using this layout she created:


I wasn't sure what I'd do for it, but grabbed my Tropical Escape DSP stack, the matching Tropical Chic set and thinlits, and got to work!  I love all of the tropical series!  The layout Jennifer created is wonderful because you can use DSP, stamps, embellishments, etc - so many shapes and sizes! 

The sentiment is from the Happy Day Gorgeous set.  I cut out the smallest hibiscus flower/leaf towards the upper right.  For the flowers near the sentiment, I stamped using Blushing Bride ink and die cut the flowers.  I popped them up using dimensionals.

If I were a washi tape person, that would work really well with this design!  But, I'm not, so I used my beloved DSP ;)

Anyway, thanks for looking and please check out what the other ladies created at the Sisters In Stamping blog here.

Have a wonderful and safe weekend!

Friday, September 7, 2018

Love my DSP!

Anyone who knows me knows how much I love DSP.  I am obsessed with it!  If I could only have one accessory to go with my stamps and ink, it would be DSP for sure!  There is just so much you can do with it.  This week, we are to feature a creation using DSP.  Since I have so many birthday cards to make, this was really easy for me!  I decided to use the Specialty DSP called Broadway Bound.  This is some fun and shiny paper!  I made two cards, actually:


I used two different papers from the DSP package.  I decided to use a piece of Gold Foil Sheet to mat each DSP piece and Basic Black as the card base for both.   Before I adhered the DSP pieces to the Gold Foil Sheets, I ran the them through the big shot to die cut the word WISH from the Broadway Birthday Bundle.  After cutting out the word, I adhered the DSP to the Gold Foil and the Gold Foil to the card base.  I then adhered the word Wish to each.  On the card with the numbers, I also ran a piece of Basic Black through the Big Shot to die cut the word.  I off-set the gold word so you could see it better over the gold numbers.  I then tied some black ribbon at the top of each and stamped the "Make A" sentiment, but it out, and adhered it right under the ribbon.  I wanted to use my new candle embellishments, so I adhered one to the the top of each card.


These were really easy and fun to make and I think will be a great card for any age or gender! 

Thanks for looking.  Check out the other DSP projects on the Sisters In Stamping blog here.

Have a great day!